Wednesday, July 26, 2017

WW1 Terrain Tiles - The Process

With the French and German figures shaping up nicely (if slowly!), the focus of my 15mm World War One project is shifting to terrain construction. I knew from the beginning that the terrain was going to be one of the most engrossing parts of this project, and for me the real excitement is in having a realistic degree of relief. Standard moveable terrain features that sit on top of a gaming mat are of course a lot easier to make and more convenient to store and transport, but I've had my heart set on trenches and craters that sit below the surface. That means creating my own modular terrain tiles that I can cut the features down into.

After some reflection, I've decided that one foot square tiles are the way to go. In 15mm scale each tile represents a good sized piece of terrain, and hopefully they should be relatively easy to pack away. Also, I was able to find precut styrofoam tiles on Ebay in this size easily, and for a good price. I've gone with 3/4" thick tiles because that is slightly taller than the figures.

Each terrain tile will consist of two thicknesses of styrofoam, making 1.5" high sides. That way I can cut trenches and craters into the top layer, and still have the ability for some tiles to make dugouts at an even lower level, or create extra deep recesses or even mine craters in no man's land. To make things easy on myself, I've decided to start with making no man's land tiles before attempting the more complicated task of making trenches.

In order to save materials, I decided that if a given tile doesn't include a feature that extends below the top layer, the bottom layer will not be a full sheet of styrofoam, but rather consist of "risers" that simply support and reinforce the top layer. When the plastic sides are added to the tile it should still be strong enough, and visually no different from a tile with two complete layers.

What follows is the process by which I made a tile featuring a small hill with shell holes spread around it. All gluing was done with a hot glue gun. This proved to be very useful stuff when working with styrofoam, because it dries quickly but not too quickly (unlike white glue) but doesn't dissolve the foam like super glue does. It's also strong and robust, not brittle. And it's inexpensive. All around good stuff. Obviously, one should be careful with it though. Extreme heat and stickiness are a potent combination.

Step 1: Here I have drawn a quick, rough outline of the space the hill will cover, and I've cut out some of the shell holes using a knife. I used the brims of a few different sizes of drinking cups as stencils for the holes.


Step 2: This is the under side of the tile. You can see I have added "risers" along the outside edges of the tile. These are just cut from one of the styrofoam panels I bought. The intention is that it will allow me to make more tiles than I otherwise would from the materials at hand, and save a little money. I also added one of the cut out pieces from the shell holes in the center of the tile as a support. 


Step 3: I glued panels of cardboard to the under side of the shell holes. They will be built out with paper mache, so these panels will stop it from falling out the bottom. 


Step 4: Here is a view of the top of the tile. You can see how it sits on the risers. Also, I have added filler pieces of styrofoam in the area of the hill, so it does not have to be built up entirely with paper mache. That would make for a very thick mound of the stuff, which would take longer to dry. 


 Step 5: I've added plastic styrene panels to the sides of the tile. This gives it much more strength, and I hope will protect the edges from crumbling over time, so that the panels sit more neatly together. They are 1.5" tall, and slightly more than 12" in length, so that there are no gaps. I trim overhang with an exacto blade after they are secured.


Here is another view of the top where you can see the side panels in place, and the filler material for the hill.


Step 6:  I've used Sculptamold to build up the hill and the shell holes. This is a sort of fine-ground paper mache powder to which you simply add water, stir and slop it on the base. It's easy to work with and easy to clean up, and it dries plenty strong enough for my purposes.

I fill the shell holes with the Sculptamold and then excavate them with my fingers, building up a little parapet around the rim. The hill was covered over with a generous amount of the stuff, and then I pressed the bottom of a round glass into it to make craters. I built those up too with my fingers. I formed a few uneven balls of Sculptamold to represent boulders thrown loose by the shells, and stuck those down on the surface.

(A note on craters: you have two competing interests here. On the one hand you want them to look realistic, which will generally mean rounded, like a ball was pressed in to the earth. On the other hand you want models to be able to sit nicely inside, which will mean a more flat bottom and straight sides, like a cylinder was pressed in. For my part, I've tried to aim for the middle ground, starting with a rounded shape and subtly flattening out bottom and sides to an extent. )

Note that I didn't bother to cover the whole tile with the paper mache. It's fine to have some flat, un-cratered spaces. In fact I will need some open spaces to add a few modular pieces on top, like shattered, burnt-up clumps of trees, a downed airplane, that sort of thing.


Here is a profile shot of the tile to show some of the relief. 


And here is a close up of the surface so you can see the texture of the Sculptamold.


Step 7: After the Sculptamold is completely dry (a process that takes one to two days with an electric fan blowing over it, depending on thickness) I sprayed the tile with a generous coat of Woodland Scenics Scenic Cement and sprinkled a mixture of sand and fine gravel over the entire surface. After giving it a few minutes I turn it over to lightly shake off the excess (which I then gather to reuse). It's okay that the covering is not completely even. 

I also add in a few larger pieces of gravel to represent larger rocks tossed loose by the explosions. I glue those on with Elmers white glue. 


Step 8: Next the entire surface and sides are coated in brown paint - which takes a while, because it can be tricky getting in all the nooks and crannies created by the paper mache and the sand and gravel covering. I use Golden Acrylics brand Burnt Umber Light, which is available in large bottles from a local art supply store. You'll need a large volume of paint, and I would recommend against trying to make it go further by slightly diluting it. It will take more time and coverage to build up opacity, and if it is watered down too much it can loosen the glue that is holding the sand in place.

You can see I also added a few plastic tree stumps. These are Woodland Scenics tree armatures, cut up into irregular pieces and glued to the surface before the brown paint was applied.


After the base coat is throughly dry, I do a lot of dry-brushing with a palette of brows and tans. I go a little lighter around the edges of the craters so they stand out a little. 

Rocks are painted a light gray, and then washed with Army Painter Strong Tone, a dark brown wash. Plastic tree bits get a few coats of the Strong Tone. 

And here is the finished tile:


Here is another tile I did (my first "proof of concept" tile). This one doesn't have any added elevation, just craters.


Here you can see how the tiles join together.


And here is a low angle shot of the two of them so the elevation is apparent:


No sooner is the terrain prepared, than rival patrols are already trying to assert dominance over the ground.


Sunday, May 7, 2017

15mm WW1 Germans - Peter Pig

When the 15mm French figures I've been working on hit the table, they will be staring across no man's land at these guys. These are Peter Pig's 15mm German line, specifically those in the mid to late war style steel helmets. As such they can represent German soldiers from mid 1916 onward.


Here is the unit as it exists so far:


Infantry charging with bayonets:


Infantry in firing positions:


And a team of 'bombers':


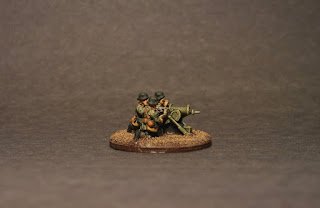
For the Mg 08 I drilled a small hole in the flash shield and added a small piece of brass wire to represent the end of the barrel (as cast, the model ends with the guard itself). I also shortened the ammo belt of the assistant so that he could sit closer to the gun and fit on the base size I had chosen. The gun is cast as one piece with the gunner, and there is no hollow space between the legs of the gun stand. But if you paint the 'empty' space black and carefully pick out the positive detail I think the effect is nice.


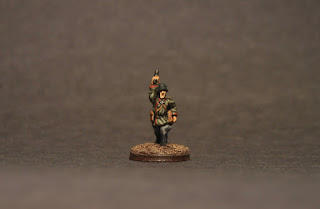
It was a very fast and simple 'conversion' to add a small piece of brass to the top of one figure's rifle to turn him into a sniper. In the TFL rules Through the Mud and the Blood designated individuals can operate as normal riflemen until they are detailed off to operate as snipers, at which point special rules kick in for them.


And here are the Big Men. Because this is one of Peter Pig's earlier lines, there is not a separate pack of NCOs/ officers (though there is a set of 'high command' figures). Each infantry set includes a commander figure.


Friday, April 21, 2017

More 15mm WW1 French

The 15mm First World War project continues, and I've added a few more figures to the French platoon. After the disastrous encounters of 1914 and 1915, French infantry platoons (like those of their allies and enemies) saw the development of many specialist roles to allow the unit to employ a variety of new weapons. Fortunately the excellent Peter Pig WW1 lines give you a lot of great options in modeling these.

Every platoon will need a lieutenant and a couple of sergeants. Without their leadership even the best-trained men will falter.


Bombers are men with a talent for grenades, a very useful skill set on the modern battlefield. Their job is to get in close while their comrades suppress the enemy, deliver a deadly volley of grenades onto the entrenched enemy, and move in to the wreckage.


To engage targets at longer range while the bombers get in to position, picked members of the platoon employ rifle grenades. The technology has come a long way since the beginning of the war, and these guys are significantly less likely to blow themselves up than they might have been a year or two ago. Honest.


Of course we're going to need plenty more ordinary riflemen too:


To lay down some really heavy fire, you could do worse than a Hotchkiss heavy machine gun:


Tuesday, April 11, 2017

15mm First World War French - Peter Pig

I recently came down with a very strong impulse to start a 1st World War project, and after deciding on 15mm scale I fell into Peter Pig's offerings in a big way. I loved the look of the figures, and their French line in particular is awesome.

My goal is to build two platoons worth to start, one mid war French and one mid war German. I intend to use these with the TFL ruleset "Through the Mud and the Blood" which I've been told works best with one to two platoons per side.

So here is the first French squad - a corporal, a chauchat gunner and his assistant, and 6 riflemen. The figures themselves are a joy to paint, with lots of character and great poses. I like the proportions, and I was pleasantly surprised with the strength of the metal, which makes the bayonets more durable than I had expected.

Eventually the platoon will sport one more squad similar to this one, a team of bombers, and one of rifle grenades.


Here in isolation are the corporal, the chauchat gunner and his assistant:


Here are just the riflemen, the backbone of the French army:


And here is a look at their backs to see the details of their gear. Honestly I probably didn't need to bother painting the backs, as I am confident they will never be shown to the enemy anyway.


Friday, January 27, 2017

USS Washington - Langton 1:1200

Here is another of Langton Miniatures' very small offerings, this one the 20 gun galley Washington, built in 1776.

To quote the Nautical Research Guild's summary of the history of this vessel:

"The Continental Galley Washington was a lateen-rigged, two-masted row galley built in the autumn of 1776 on Lake Champlain at Skenesboro N.Y. On October 6 1776, she joined the small fleet established and commanded by Brigadier General Benedict Arnold. Washington was among Arnold's ships that anchored in the narrow body of water between the western shore of Lake Champlain and Valcour Island to await the expected British move. On October 11th the British attacked from leeward. As a result of the battle Washington suffered the heaviest damage to the American fleet.

"Arnold regrouped his fleet and slipped past the British fleet in a desperate attempt to escape. However, they caught the retreating Continental force on October 13th, at Split Rock near Crown Point. Arnold managed to beach and destroy four of the galleys and his own flagship, Congress, while most of the remaining ships escaped upriver. Washington, at the rear of the van, was captured by the enemy; she struck her colors, as Arnold reported later, "... after receiving a few broadsides." After her capture Washington was repaired and put into British service on the lake. It was during this period that her lines were taken off."


You can find the NRG's description and an amazing guide to scratch-building a model of the galley (by Jeff Staudt) here:
http://www.thenrg.org/the-galley-washington.php

And here is Langton's 1:1200 model:


Here for size comparison the model is seen with several other Langton kits. To her left is a small schooner with a pivot gun, to her right a gunboat. To the rear is a 24 gun frigate.


Monday, January 23, 2017

Warlord Games 28mm Praetorians

Here is a unit of 28mm Praetorian Guardsmen that I've just completed for a commission. These are some of Warlord Games' plastic offerings, and I think they are very attractive figures. Each one is comprised of 5 parts: body, weapon arm, shield, head and crest. Detail is pretty crisp, and there are some nice touches, like the 5 different faces included for the regulars. There is also a new arm pose not included in the regular legionary box set - an upright javelin held close to the body.

My only complaint about this set is the shield decals. The graphics themselves are perfectly fine, but in every other way they are extremely frustrating. They have too much "flash" of clear film around the edges, they had to be soaked too long to remove them from the backing paper (I tore several even after soaking more than 45 seconds) and - probably because of that - adhesion to the shield is extremely weak. They started curling off immediately, and I had to develop a routine where right after applying the two halves to one shield I would immediately coat it in matt varnish to get it to stick. It made for a slow, excruciating process, which is not how decals have to be. I've only had good experiences with other brands.

Still, they do make for a nice looking unit, and are an economical option.